Support
AccuMail frameworks Mailing
Is there a way to print my address labels in reverse order?
How do I print the Optional Endorsement Line (OEL) on my label?
How do I print an Intelligent Mail Barcode on my pieces?
How do I print the required Post Office Reports?
How do I export a list in presort order?
How do I remove blank printing lines when a field has no data for a specific record?
How do I add additional lines to my address block?
How do I save my Zone Chart?
In AccuMail frameworks, all of the zone tables are embedded in the program. The Entry Post Office in the presort setup will determine the correct zone table to use. There is no need to “define” the zip codes in a zone.
Back To Top
Is there a way to print my address labels in reverse order?
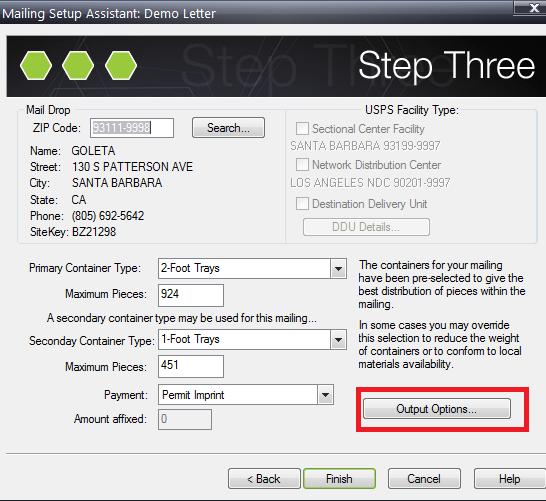
Yes, this is done at the Step Three of the Mailing setup. Click on Output Options.
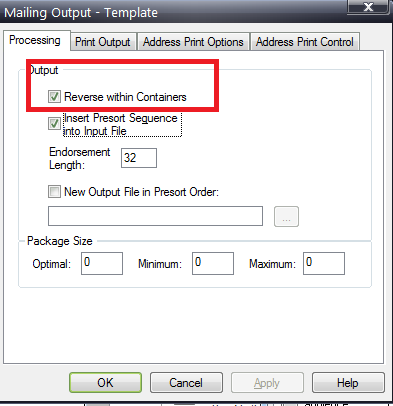
On the Mailing Output screen, there is a box labeled “Reverse within Containers” Check it if you want to print your labels in reverse order.
Back To Top
How do I print the Optional Endorsement Line (OEL) on my label?
This is done at Step Three of the Mailing setup in the Postal Presorting task. Click on Output Options.
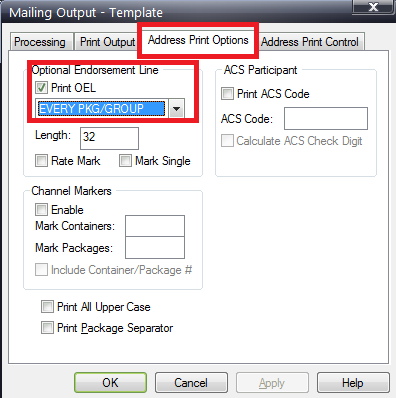
Click on the Address Print Options tab and then select Print OEL and Every Pkg/Group option. Click OK.
Back To Top
How do I print an Intelligent Mail Barcode on my pieces?
This is a two-step process the first time you print Intelligent Mail Barcodes. First you need to setup AccuMail frameworks with you Mailer Id that you obtain from The USPS. This is a 6 or 9 digit number. Once you have that number, Go to the Tools menu and select User Info… or click on the ![]() icon. This brings up the System User Info screen. Find the USPS Mailer ID and enter the 6 or 9 digit number and your PostalOne! User License Number if you have one. Click OK.
icon. This brings up the System User Info screen. Find the USPS Mailer ID and enter the 6 or 9 digit number and your PostalOne! User License Number if you have one. Click OK.
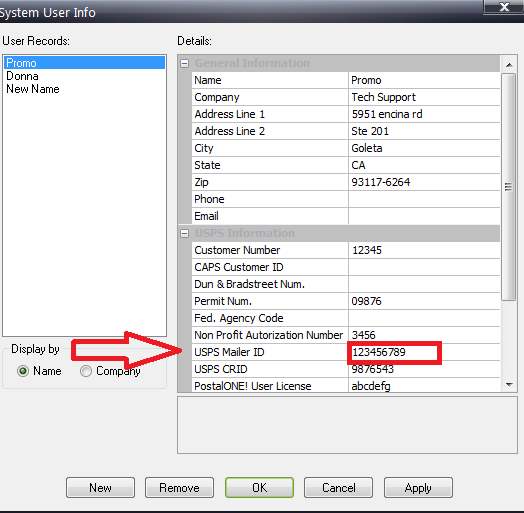
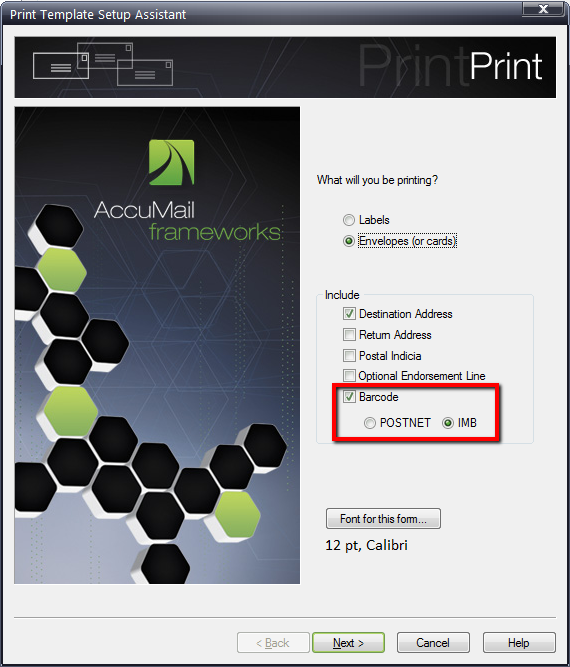
The second step is to tell AccuMail frameworks that you would like to print the Intelligent Mail Barcode on your label or envelope. This is done when you are setting up your label or envelope in the Print Template Setup Assistant.
Simple select Barcode and IMB as your barcode type. This will automatically print the IMB on your label/envelope.
Back To Top
How do I print the required Post Office Reports?
After setting up and running the presort, click on the Mailing Jobs tab on the Postal Presorting task if it is not already selected. Select the correct presort and then click on the Print Reports button. Select which reports you want to print and then click the Print button. This will allow you to reprint the reports from any previously sorted presort as long as the Mailing job has not been deleted or overwritten.
Back To Top
How do I export a list in presort order?
This is done at Step Three of the Mailing setup in the Postal Presorting task. Click on Output Options.
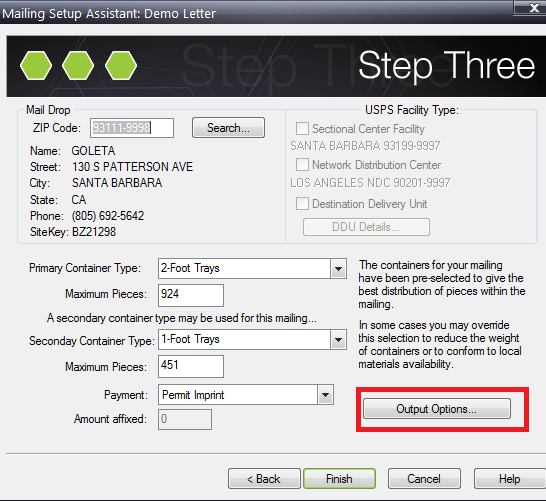
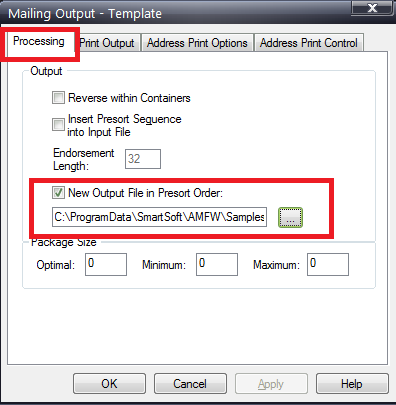
Select the Processing tab and check the New Output File in Presort Order. You will be prompted for the path and file name to save the presorted data to. Click OK.
Back To Top
One of my address lines prints to the left of all the others. How do move that line to match the rest of the printed lines?
In the Print Designer task, select the desired template and click Open.
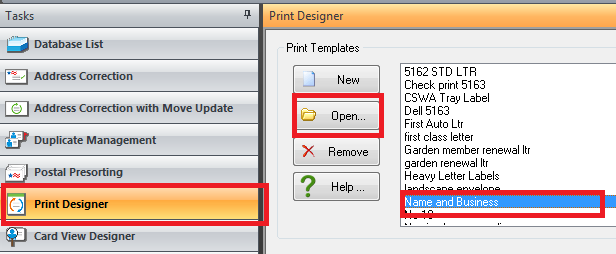
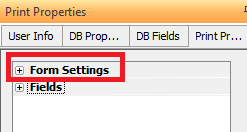
This opens the template for editing. Under Print Properties, there are two main selections: Form Settings and Fields. Select Fields.
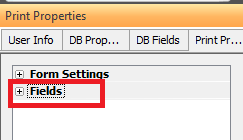
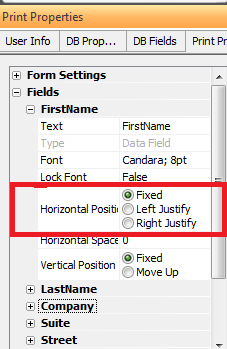
Find the field that is printing out of alignment and then click on the + to the left of the field name. This displays the attributes of the field. To adjust the Horizontal position, select from: Fixed (choose this if the field selected is the first field on a specific line); Left Justify (choose this if the field is not the first field on a specific line); or Right Justify (choose this if you want the alignment to start on the right side of the line.
Back To Top
How do I remove blank printing lines when a field has no data for a specific record?
In the Print Designer task, select the desired template and click Open.

Click the + next to Fields

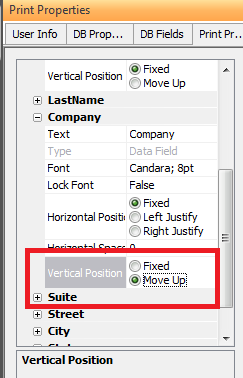
Then select the desired field. Click on Vertical Position and select Move Up. So this for each field that you want to move up if a field above it is blank.
Back To Top
How do I add additional lines to my address block?
In the Print Designer task, select the desired template and click Open.

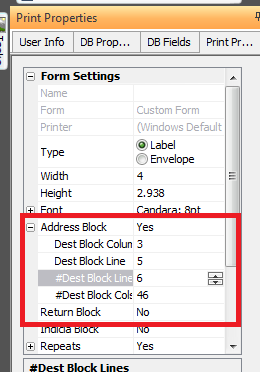
This opens the template for editing. Under Print Properties, there are two main selections: Form Settings and Fields. Select Form Settings, click the +sign to open the settings of the template form.
Find the Address Block section and click on the + to open the attributes for the Address Block. The attribute called #Dest Block Lines control how many lines are in the address block. Use the up and down arrow keys to add or delete lines in the address block.
